
Role templates
For admins
A role template is a named set of permissions you give to members. It decides which parts of the app they see, what they can add, and which of their additions wait for approval first. Every member except the Owner has exactly one role template, and you can create as many as your workspace needs.
Before you begin
Section titled “Before you begin”- Your role template needs role to open Admin → Role. The Owner always has it.
- Only the Owner and people with workspace administration can give out a role template that includes workspace administration. See Workspace administration.
The built-in role templates
Section titled “The built-in role templates”Every workspace comes with two templates. You can open them with View but you can’t change or delete them.
| Template | What it gives |
|---|---|
| admin | Everything: every section, every Personalization area, every Admin area, and workspace administration. |
| Member | Every section, Personalization area, elf setting and AI provider setting, but no Admin areas. Members work on their own things and what is shared with them. New invitations start on it. |
Create your own template when you need something in between, such as a team lead who can approve requests but not see billing.
How each setting works
Section titled “How each setting works”Each row in a role template has two or three choices:
- enable: members can use it. Anything they add is live straight away.
- disable: members can’t use it. The option is hidden from them.
- IT Manager Approval: members can add, change or delete things, but each change becomes a request. Their IT manager (or someone else who can approve) reviews it in Admin → Approvals first.
Rows are grouped (Chat, Teams, Dashboard, Agent, Pixies, Elves, Personalization, Account, Admin). Each group has its own enable and disable at the top: choosing one sets every row in the group at once. While a group is set to disable, its rows are grayed out.
Create a role template
Section titled “Create a role template”-
Select Admin in the rail, then Role.
-
Select New role.
-
Type a Name, such as “Marketing team”.
-
Go through the groups and choose enable, disable or IT Manager Approval for each row. A new role starts with everything set to enable.
-
Select Create role.
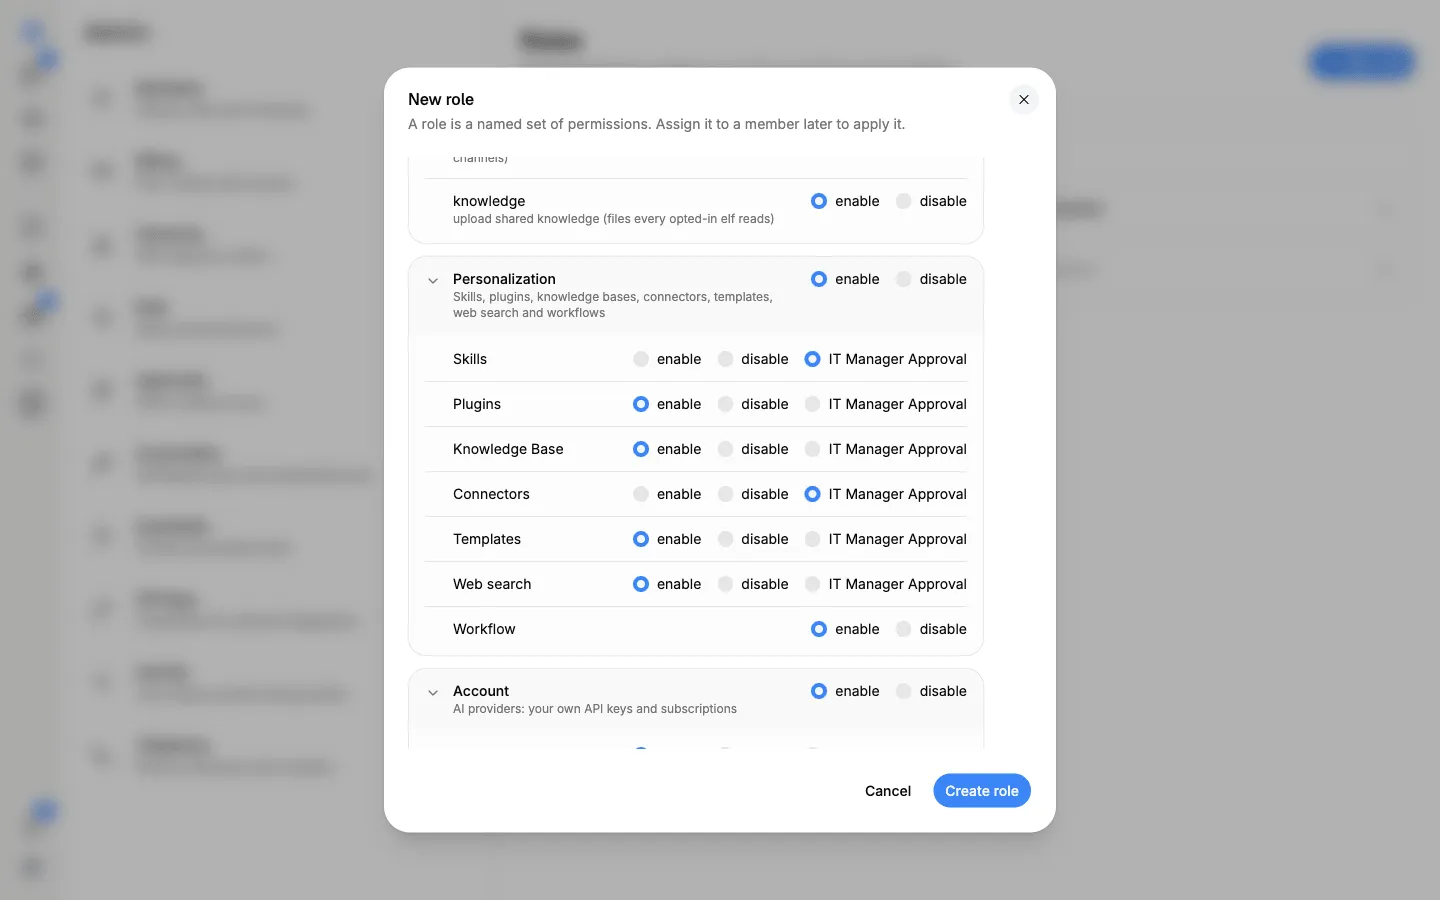
The new template is ready to give to members and invitations.
What you can control
Section titled “What you can control”Sections of the app
Section titled “Sections of the app”| Row | What it controls | Choices |
|---|---|---|
| Chat | The Chats list and AI chats. | enable, disable |
| Teams | Teams and posting in them. | enable, disable |
| Dashboards | The Dashboards section, and whether the Dashboard elf may read workspace data and use connected apps. | enable, disable |
| Agents | Building and running agents. | enable, disable, IT Manager Approval |
| Pixies | The Pixies section. | enable, disable |
With disable, the section’s icon disappears from the rail and its pages don’t open.
Personalization and AI providers
Section titled “Personalization and AI providers”| Row | What it controls | Choices |
|---|---|---|
| Skills | Adding, changing and deleting skills. | enable, disable, IT Manager Approval |
| Plugins | Adding, changing and deleting plugins. | enable, disable, IT Manager Approval |
| Knowledge bases | Creating, changing and sharing knowledge bases. | enable, disable, IT Manager Approval |
| Connectors | Connecting apps such as Gmail or Slack. | enable, disable, IT Manager Approval |
| Templates | Content templates and action templates. | enable, disable, IT Manager Approval |
| Web search | Adding web search tools. | enable, disable, IT Manager Approval |
| Workflow | Building and running workflows. | enable, disable |
| api-key (under Account) | Adding, changing and deleting the member’s own AI API keys. | enable, disable, IT Manager Approval |
| The row below api-key | Connecting and disconnecting the member’s own AI subscriptions. | enable, disable, IT Manager Approval |
| Row | What it controls | Choices |
|---|---|---|
| create | Who can add a new elf. | enable, disable, IT Manager Approval |
| always-on | Keeping an elf always on. Its computer time uses credits every minute it runs. | enable, disable |
| resources | Pinning skills and connectors to an elf. | enable, disable |
| resize | Choosing a bigger computer for an elf, which uses more credits a minute. | enable, disable |
| knowledge | Uploading and removing shared knowledge: files that every elf set to use it can read. | enable, disable |
Each Admin area is enable or disable only. There is no approval choice here, because approving requests is itself an Admin area.
| Row | What it opens |
|---|---|
| members | Admin → Members: invite, edit and remove members. |
| billing | Admin → Billing: see the plan, usage and invoices. |
| hierarchy | Admin → Hierarchy, and editing members’ details. |
| role | Admin → Role: create, edit and give out role templates. |
| approvals | Admin → Approvals: review and decide requests. |
| ai-providers | Admin → AI providers: workspace keys and keys for unattended work. |
| guardrails | Admin → Guardrails. |
| api-keys | Admin → API keys: create and revoke keys for other systems. |
| activity | Admin → Activity: your own chats and agent runs, step by step. |
| activity-manage | Turning activity tracing on or off for the workspace. It uses credits, and needs activity too. |
| telephony | Admin → Telephony, for people who also have workspace administration. |
Changing the plan, cards, top-ups and credit limits needs permission to manage billing on top of billing. The built-in admin template has it and Member doesn’t. People who can view billing but not change it see a note saying so on Admin → Billing.
Give someone a role template
Section titled “Give someone a role template”- When you invite them: pick the Role on their row in the Invite by email panel (the ⋮ menu on Members).
- Later: in Admin → Members, open the ⋯ menu on their row, select Edit details, pick a Role and select Save changes.
Compare role templates
Section titled “Compare role templates”Admin → Role lists every template with a summary of its settings, such as 12 enabled, 3 approval, 9 disabled. Select the arrow at the start of a row to see every setting in that template. Built-in templates are marked Built-in.
Edit or delete a role template
Section titled “Edit or delete a role template”- Edit: open the ⋯ menu on its row, select Edit, make your changes and select Save changes. Everyone on the template gets the change at once and is notified that their role changed.
- Delete: open the ⋯ menu and select Delete. If members or invitations use the template, choose which template they move to first. Member is offered first.
The built-in admin and Member templates can’t be edited or deleted.