
Widget boards
A Widget Board is a dashboard made of tiles, called widgets. Each widget comes from Atlato’s ready-made widget library, so every board looks consistent and you can tune each tile on its own. You can add widgets yourself, ask Dashboard elf to build them, or mix both.
Widget Boards work with any AI model, including low-cost ones.
Before you begin
Section titled “Before you begin”- Create the board first: select Dashboards → New dashboard → Create with Atlato widget library. See Create a dashboard.
- To add or change widgets, you need to own the board or have Can edit access to it.
Build with Dashboard elf
Section titled “Build with Dashboard elf”The quickest way to fill a board is to say what you want to see.
-
Open the board. If the Build with Elf panel is not already open, select the ⋮ menu at the top right, then Build with Elf.
-
Type what the board should show in What should this dashboard show?, for example “Overdue tasks by assignee and workflow runs that failed this week”. You can also select one of the suggested ideas under the greeting.
-
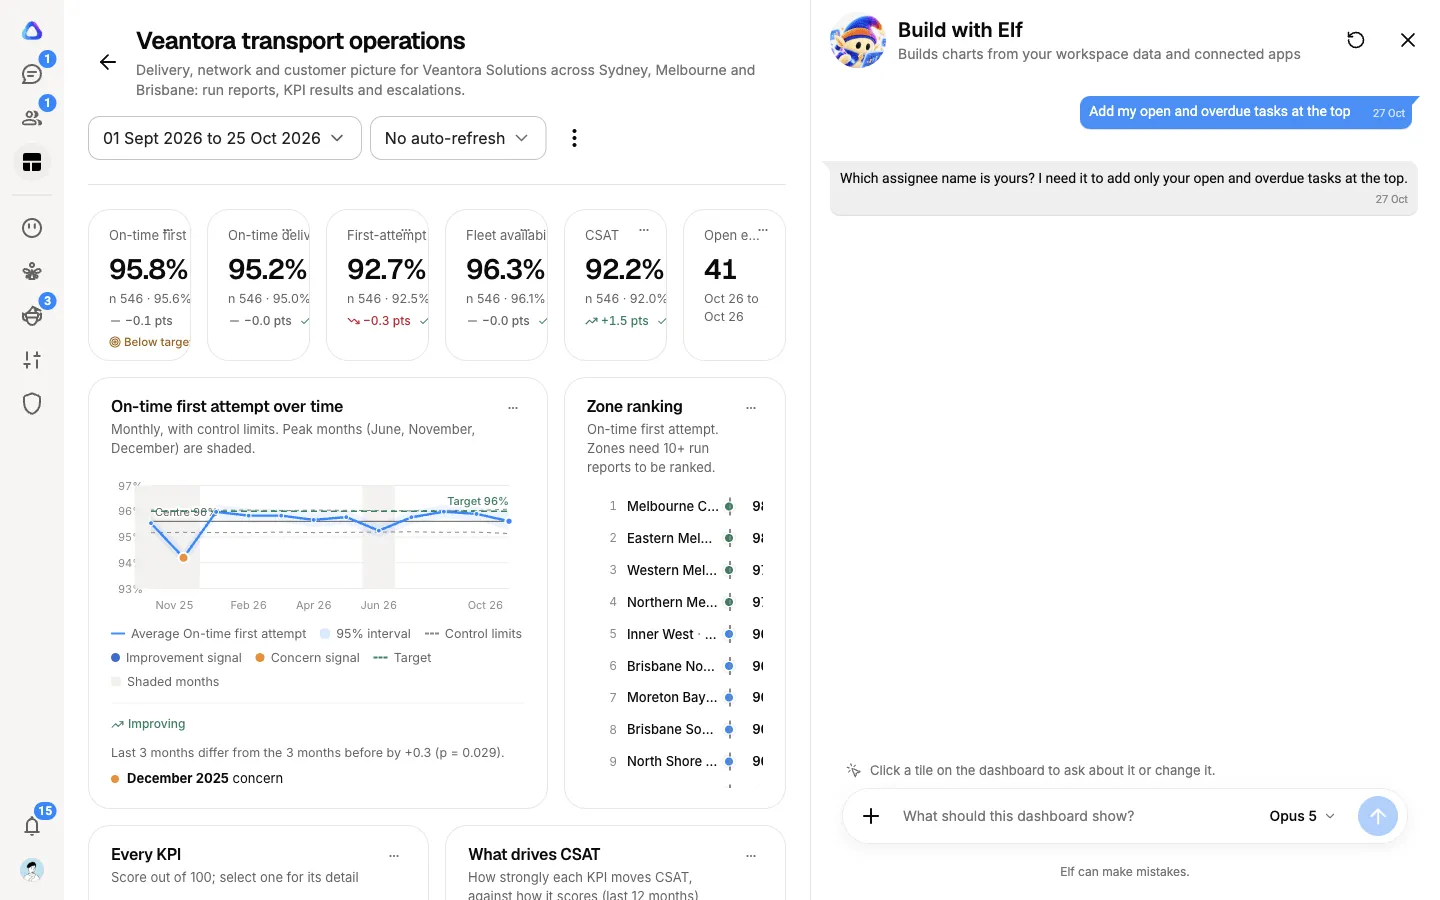
Send the message. Dashboard elf looks at your data, picks the right widgets and adds them to the board. You can watch its progress, such as Looking at your data and Arranging the tiles, while it works.
-
If Dashboard elf needs to know more, it asks. Pick one of its suggested answers or type your own.
To stop Dashboard elf mid-way, select Stop. To clear the conversation and begin again, select Start over at the top of the panel. Your widgets stay on the board.
Show Elf what you mean
Section titled “Show Elf what you mean”- Point at a widget. While the Build with Elf panel is open, select any widget to pick it, then describe the change (“make this a gauge with a target of 100”).
- Show a widget to copy. In the message box, select +, then Add reference widgets, and choose a widget from the library for Dashboard elf to build like.
- Point it at your data. Select +, then Knowledge Base or Connectors, and pick one to tell Dashboard elf where the data is. See Let Dashboard elf add sources for you.
Add a widget yourself
Section titled “Add a widget yourself”-
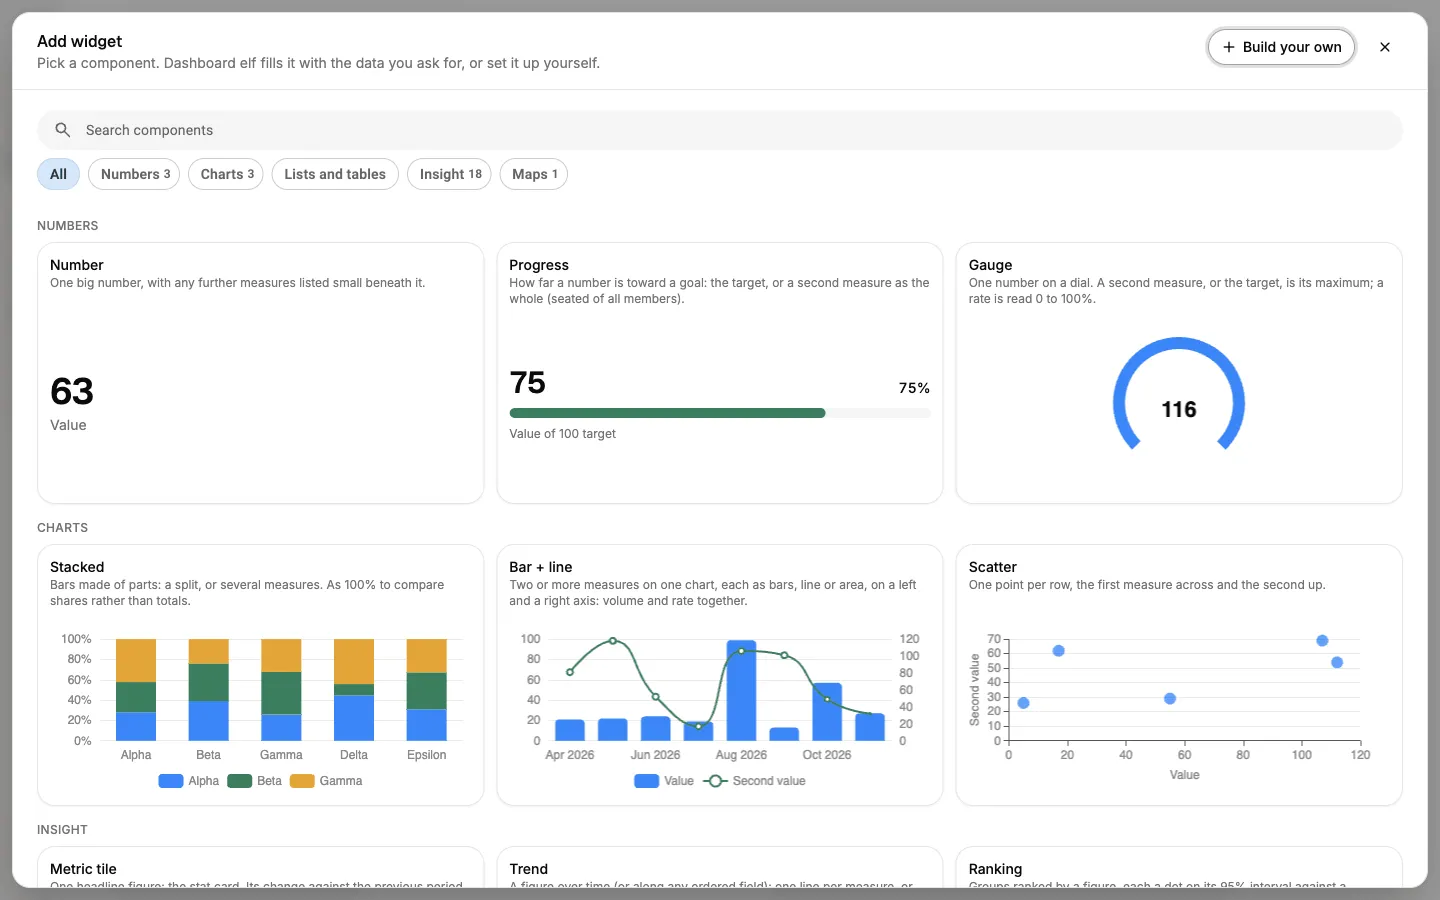
Select the ⋮ menu, then Add widget. The widget library opens.
-
Browse or search the library. Components are grouped by what they show, such as Numbers, Charts, Insight and Maps, and each one is drawn on sample numbers so you can see how it looks.
-
Select a component. You see it full size and can choose how to fill it:
- Build with Elf hands it to Dashboard elf, which fills it with the data you ask for.
- Configure manually lets you set its look yourself on sample numbers. After you save it, Dashboard elf maps your data into it.
-
If you configure it yourself, change its name and settings on the Settings tab, then select Save widget.
A widget that is still on sample numbers wears a Sample data tag. Ask Dashboard elf to map your data into it, or select the widget’s menu and then Change with Elf.
Change a widget
Section titled “Change a widget”Every widget has its own menu (the … button in its corner). Depending on your access, it offers:
| Menu item | What it does |
|---|---|
| View rows | Opens the rows behind the widget, with search and Download CSV. |
| View data | Shows the data the widget is drawn from. |
| Download PNG | Saves the widget as a picture. |
| Download CSV | Saves the widget’s numbers as a spreadsheet file. |
| Change with Elf | Opens the Build with Elf panel with this widget picked. |
| Edit | Opens the widget’s settings. |
| Remove | Takes the widget off the board. |
In Edit you can rename the widget, switch to another Chart that fits the same data, and adjust settings such as number format, decimals, color, targets and thresholds, legend and labels. Each widget also has its own Auto-refresh: Follow dashboard, Never, a preset interval, or Custom interval….
To change which data a widget shows (another measure, a different grouping, a new filter), ask Dashboard elf with Change with Elf.
Drill into the numbers
Section titled “Drill into the numbers”Select a bar, a slice or a point on a chart to see the rows behind it. The rows open in a window where you can search them and select Download CSV. Some insight widgets open a side panel with more detail instead.
Arrange the board
Section titled “Arrange the board”-
Select the ⋮ menu, then Edit layout.
-
Drag widgets to move them, and drag a widget’s edge or corner to resize it.
-
Select Done when you are finished.