
Connectors
A connector links Atlato ABC to another app, so the AI can read from it and, with your approval, act in it: find an email in Outlook, post in Slack, look up an invoice in Xero. Connect an app once and your chats, agents and elves can use it.
Each person signs in with their own account. When a connector is shared, what is shared is the setup, never your login, so the AI only ever sees what your own account can see.
Before you begin
Section titled “Before you begin”- Any member can connect an app, because the connection is their own account.
- If your role uses IT Manager Approval for connectors, the first connection waits for an admin. The card shows Pending approval until then.
- Some apps need your organization’s admin to approve them once before anyone can connect. The connector’s page says so under Good to know. For example, SharePoint may need your Microsoft 365 admin, and Slack or monday.com may need that workspace’s admin.
Connect an app
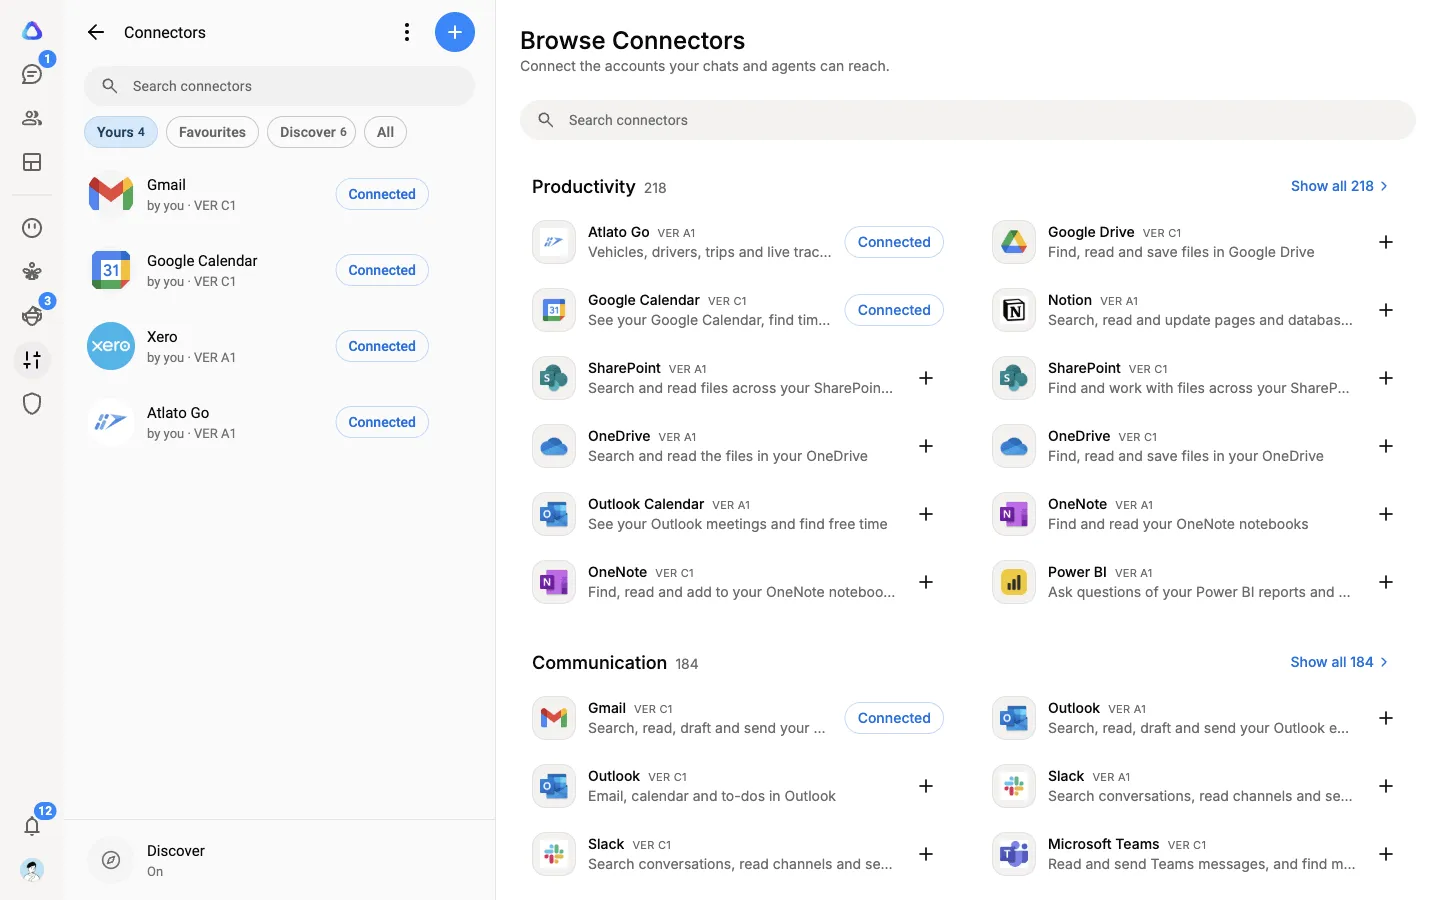
Section titled “Connect an app”Open Personalization → Connectors. The main area shows Browse Connectors: more than a thousand one-click connectors, grouped by category, such as Productivity, Communication, Sales, Finance and Design & media. Featured holds the ones Atlato set up and describes by hand.
-
Search for the app, or browse a category.
-
Select + on its card.
-
Sign in to the app in the window that opens, and allow access. Some apps let you choose what to allow, or which account or organization to connect.
-
A window named for the app opens, such as Outlook is connected, listing the app’s tools and what each may do without asking. Owners and admins can change them here, or select Allow all to let every tool run without asking. See Tool permissions below.
-
Select Done. The card now shows Connected, and the app appears in your Connectors list.
The window only opens the first time you connect an app, not when you reconnect it. Closing it keeps the settings as they are, and you can change them later on the connector’s page. If some of the tools are destructive, Allow all asks first: select Allow all anyway to go ahead.
Select a card to open the connector’s page first. It shows prompts to try, what the app can do, Good to know notes and links to the app’s documentation and privacy policy.
Well-known connectors include Microsoft 365 (Outlook, Outlook Calendar, SharePoint, OneDrive, OneNote and Power BI), Gmail, Slack, Xero, Notion, Linear and Atlato Go, Atlato’s own fleet management connector.
Use a connected app
Section titled “Use a connected app”- In a chat: ask for what you need, such as “Summarize my unread emails from today”. To point the AI at one app, type / and pick it under Connectors. See Connected apps in chats.
- In agents and elves: add the connector to the agent or elf, and it uses your connection.
Before the AI changes anything in an app (sending, creating, updating or deleting), it asks you first, unless your workspace allows that action. See Tool permissions below.
Tool permissions
Section titled “Tool permissions”Each connector offers a set of tools: the individual things it can do, like “Search emails” or “Create invoice”. Tool permissions decide what each tool may do without asking first. They apply to everyone in the workspace who uses that connector, in chats, agents and elves.
| Setting | What happens |
|---|---|
| Always allow | The AI uses the tool without asking. |
| Needs approval | The AI stops and asks you before each use. |
| Blocked | The AI can’t use the tool at all. |
By default, read-only tools are Always allow and tools that change things are Needs approval. Tools that delete or overwrite something are marked Destructive.
To see or change them:
-
Connect the app first. The list of tools comes from the app itself, through your own sign-in, so until you connect, the page shows a Connect button in its place.
-
Open the connector from your Connectors list. Tool permissions is the main part of its page, under the app’s description. From a card’s page in the gallery, select Tool permissions to get there.
-
Tools are grouped into Read-only tools and Write tools, each with a count. Select a group’s name to fold it away or open it again.
-
Each tool has three buttons side by side: Always allow, Needs approval and Blocked. Select one to change that tool. Point at a tool’s name to see what it does. To set the whole group at once, use the menu beside the group’s name.
-
To undo your changes, select Reset beside a tool, or Reset to defaults in the group’s menu.
For an app with many tools, a search field above the list finds a tool by name or by what it does. Long groups show part of the list at first, with a button at the end to show more.
The account the app is connected to, when it was connected and what it was allowed to see are under Connection details at the foot of the page.
Everyone can see tool permissions, so you know what the AI will ask before it runs. Only owners and admins can change them.
Approving a tool in a chat
Section titled “Approving a tool in a chat”When a tool needs approval, the chat shows a card marked Waiting for you with what the AI wants to do. You can:
- Allow once: run it this time.
- Allow for this chat: stop asking for this tool in this chat.
- Edit: change the details first, then Run with changes.
- Deny: don’t run it.
A destructive action carries a warning that it deletes or overwrites something and cannot be undone.
Reconnect an app
Section titled “Reconnect an app”An app’s sign-in can expire. When it does, the connector shows Reconnect in your list and on its card, and its page says the sign-in has expired.
Select Reconnect and sign in again. Its tools come back as soon as you do.
To stop using an app, open its page and select ⋮ → Disconnect.
Add a connector by its server URL
Section titled “Add a connector by its server URL”For an app that isn’t in the gallery but offers a compatible connector, you can add it by its server URL. This is an advanced option; the app’s own documentation tells you the URL and any sign-in details.
-
In the Connectors list, select +. The Add a connector column opens.
-
Paste the server URL and select Next. Atlato ABC reads what it can from the server and fills in as much of the setup as possible.
-
Give it a Display name and a Description. The description is written for the AI: name the data it touches and the actions it can take.
-
Fill in any sign-in details the app’s documentation asks for, selecting Next after each screen.
-
Choose who can see it, then select Save connector.
Sharing a connector you added still shares only the setup. Everyone you share it with signs in with their own account.