
Templates
A template is a shape that something fills in later. Templates keep the output of your workflows and agents consistent: the same report layout every week, the same form every time an agent needs details from someone.
There are two kinds, listed together in Personalization → Templates. Each row is tagged Content or Action.
| Kind | What it is | Where it is used |
|---|---|---|
| Content | A layout something is rendered into, such as a report or an email, with named fields the AI fills in. | A workflow step fills in the fields and produces the finished document, such as a PDF report. |
| Action | A card an agent shows when it needs something from a person, or the view an approval is read in. | Agents that ask for input, and approval steps in workflows. What people enter reaches the next step. |
Before you begin
Section titled “Before you begin”- Creating templates depends on your role. If your role uses IT Manager Approval for templates, a new template shows Pending until an admin approves it.
- Custom HTML views for approvals can only be created by workspace owners and admins.
Create a content template
Section titled “Create a content template”-
In the Templates list, select +. The New template column asks What is this template for? Select Content template.
-
Give it a name, such as “Weekly summary”, and a description, then select Next.
-
Under Choose the paper, pick the Page size and Orientation. You can change both later.
-
Choose who can see it, then select Open editor. Nothing is saved yet: the template is created when you select Save in the editor. If you leave the editor before saving, you’re asked to save or discard it.
-
In the editor, drag blocks onto the page and style them. Where the AI should write, add a named field such as
{{summary}}or{{next_steps}}. A template needs at least one field before you can save it. -
Select Preview to check the layout, then Save.
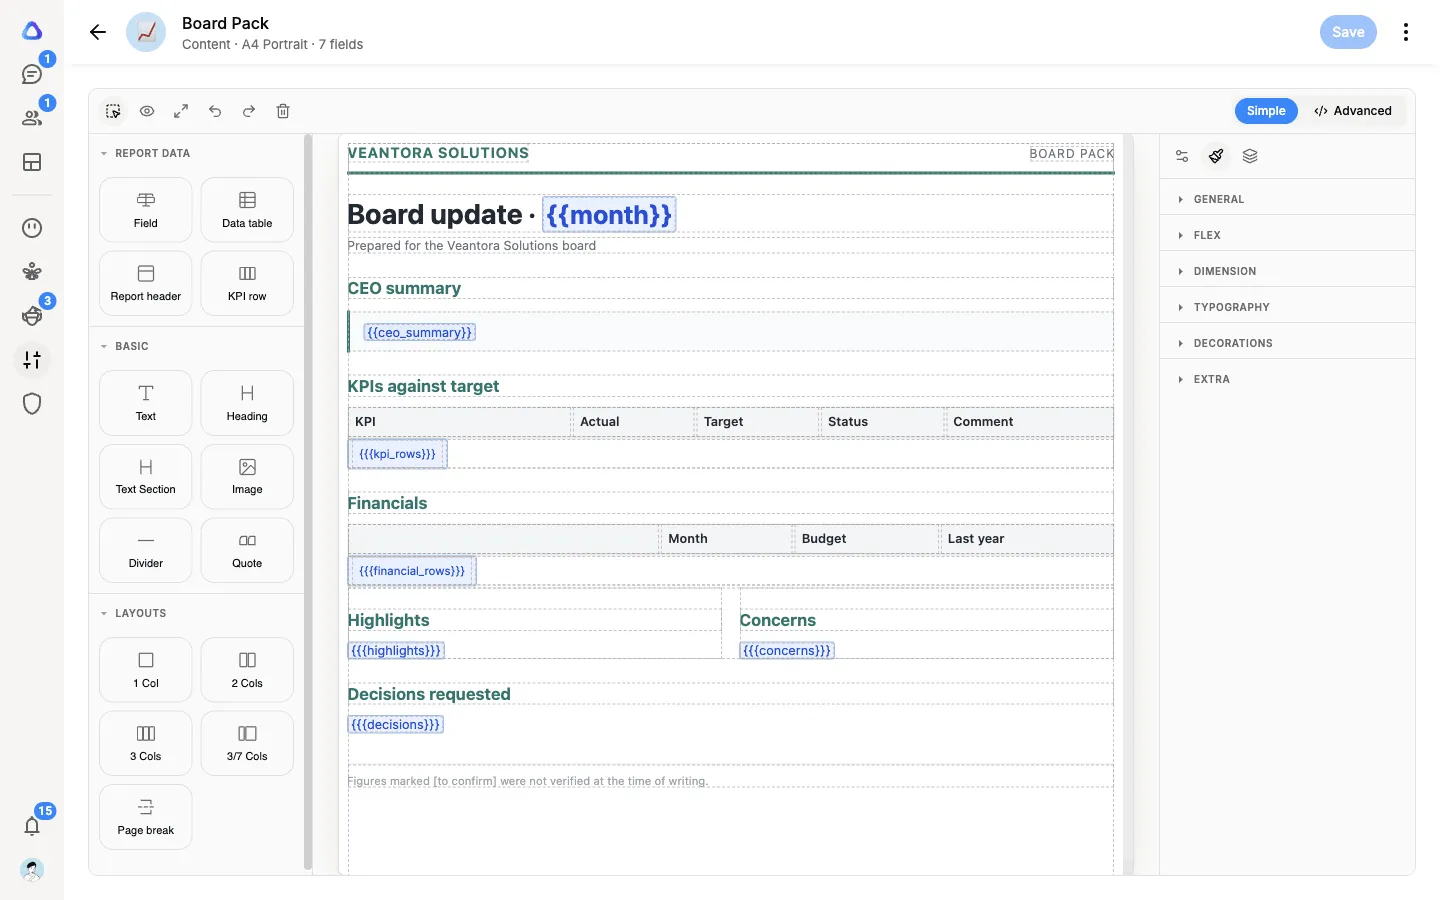
To use it, point an AI step in a workflow at the template. Each run fills in the fields and produces the document. See Workflow steps.
Create an action template
Section titled “Create an action template”-
In the Templates list, select +, then Action template.
-
Choose how to build the card:
- Simple, then Blank: an empty card with one button. Add fields, rows, file uploads and steps by dragging parts onto it.
- Simple, then Start from a template: pick one of Atlato’s ready-made cards, such as inventory intake, bill entry, document check or an approval, to use as it is or change.
- Advanced, then Custom HTML view: a page you write yourself, with any layout and your own branding. For approval steps only, and for owners and admins only.
-
Give it a name and a description, then select Next. For a card an agent shows, the description is read by the agent: say when it should use the card.
-
Choose who can see it, then select Open editor. The card opens in the builder. Nothing is saved until you select Save there.
-
Build the card. Drag in parts such as Short text, Number, Date, Dropdown, Checkbox, Rows for repeating line items, and File / photo. If you prefer, switch to editing the card as JSON at any time.
-
Select Save.
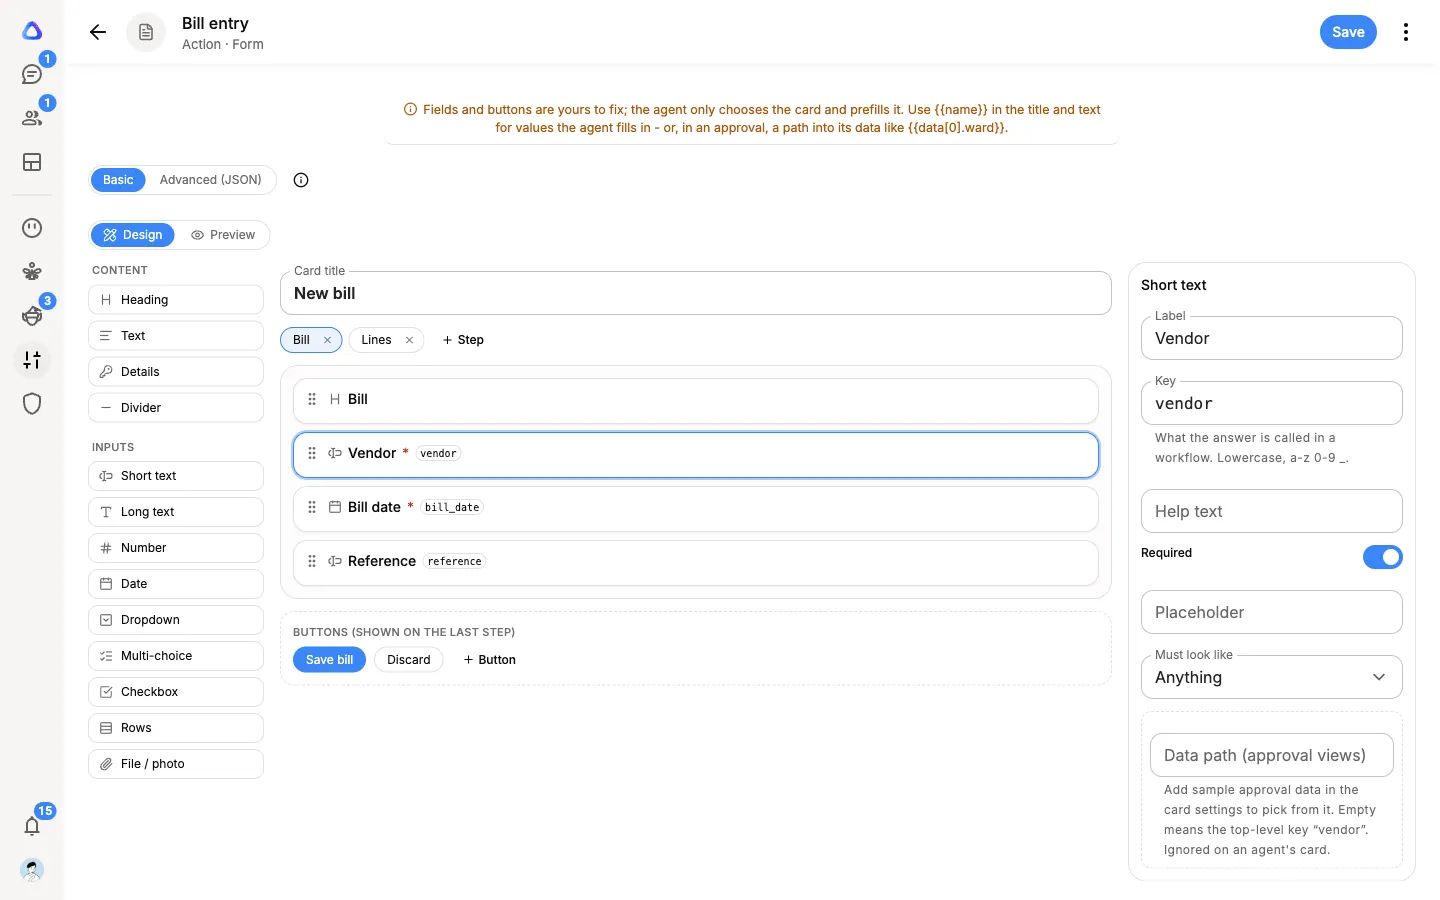
To use an action template, add it to an agent so the agent can show it when it needs details, or pick it as the view for an approval step in a workflow. See Workflow approvals.
Edit or delete a template
Section titled “Edit or delete a template”Open a template from the list to edit it. Use its ⋮ menu to change who can see it or to delete it. Deleting a content template means workflows that use it can no longer produce their document.