
Skills
A skill is a set of instructions the AI reads before it answers: how your team writes a weekly status report, your brand voice, the checks to run on an invoice. Write a skill once and every chat and agent you give it to follows it the same way.
You can add a ready-made skill from Atlato’s gallery, write your own, or upload one you already have.
Before you begin
Section titled “Before you begin”- Anyone can add skills from the gallery and use them.
- Writing or uploading a skill depends on your role. If you don’t see the + button on the Skills list, ask an admin.
- If your role uses IT Manager Approval for skills, a new skill shows Pending until an admin approves it. See Approvals.
Add a skill from the gallery
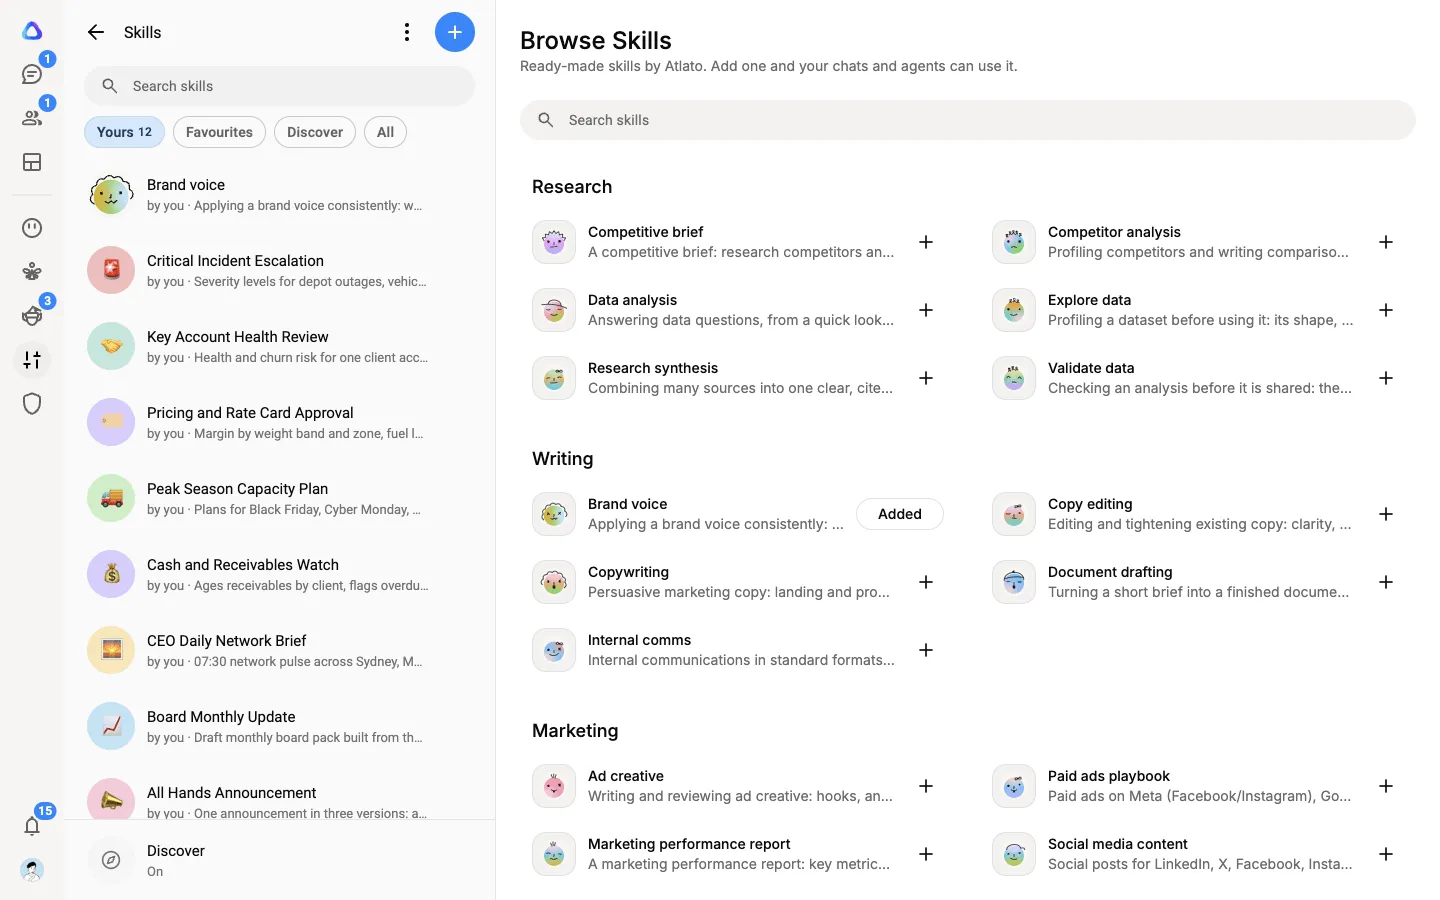
Section titled “Add a skill from the gallery”Open Personalization → Skills. The main area shows Browse Skills: ready-made skills by Atlato, grouped by category.
-
Search, or scroll the categories, to find a skill.
-
Select a card to preview it: what it does and every file it contains.
-
Select + on the card, or Add skill in the preview.
The skill becomes your own copy. It appears in your Skills list, in the chat / menu and in your agents’ skill picker. The card now shows Added; select it to open your copy.
Your copy is a snapshot. If Atlato later improves the original, your copy doesn’t change. Delete your copy to bring the + back.
Write your own skill
Section titled “Write your own skill”-
In the Skills list, select +. The Skill Builder opens, where you can describe the skill and let AI write it. See Create a skill or plugin by chatting.
To write it yourself, open the menu at the top of the builder (it reads Builder) and select Configure manually. The Create a skill column opens.
-
Give the skill a name, such as “Weekly status report”, and a description.
The description is written for the AI: it is how the AI decides whether to use the skill. Say what the skill does and when to use it, for example “Generate weekly status reports from recent work. Use when asked for updates or progress summaries.”
-
Select Next and write the instructions: what the AI should do when it uses this skill, step by step. You can add files for it to read alongside, such as an example or a checklist.
-
Select Next, choose who can see it (Only me, Shared with or Anyone), then select Create skill.
The skill’s page opens, where you can add more files or edit what you wrote.
Upload a skill
Section titled “Upload a skill”Already have a skill file, or one a colleague sent you?
-
In the Skills list, select ⋮ at the top, then Upload.
-
Drag the file in, or click to choose it. You can upload a single
.mdfile, or a.zipor.skillbundle. A bundle must contain aSKILL.mdfile. -
Select Next, check the name and description, and select Next again.
-
Choose who can see it and select Create skill.
Use a skill
Section titled “Use a skill”- In a chat: type / in the message box and pick the skill under Skills. The AI reads it when the task needs it. See Skills and memory in chats.
- In an agent: add the skill in the agent’s settings, so the agent can use it on every run. See Build your own agent.
Edit, version and restore
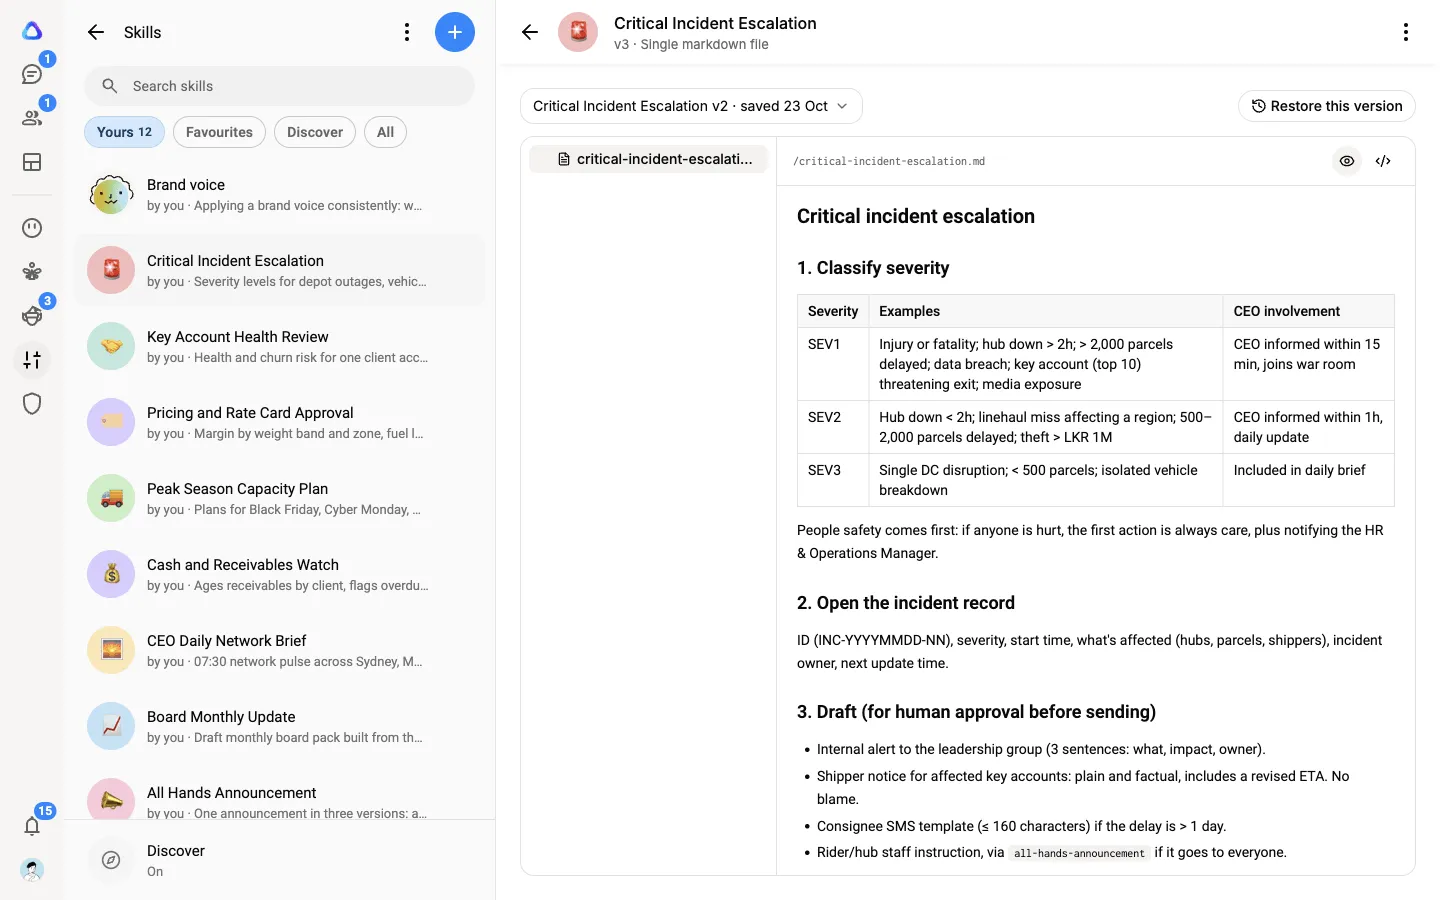
Section titled “Edit, version and restore”Every skill keeps its history. Each save makes a new numbered version (v1, v2, v3), and the newest is what chats read.
-
Open the skill from your Skills list. Its page shows the current version and its files.
-
To change it, select ⋮ → Edit. The skill opens in the Skill Builder, where you can ask for the change or edit it yourself. Select Save to make a new version.
-
To look at an earlier version, pick it from the version list beside the files.
-
To go back to it, select Restore this version.
Restoring saves the old contents as a new version, so nothing is lost: the version it replaces stays in the list.
The skill’s ⋮ menu also has:
- Skill details: the picture, name and description.
- Download: a copy of the skill, at the version on screen.
- Who can see this…: change who it is shared with.
- Delete: chats and agents stop using the skill, and every saved version is removed.