
Find your way around
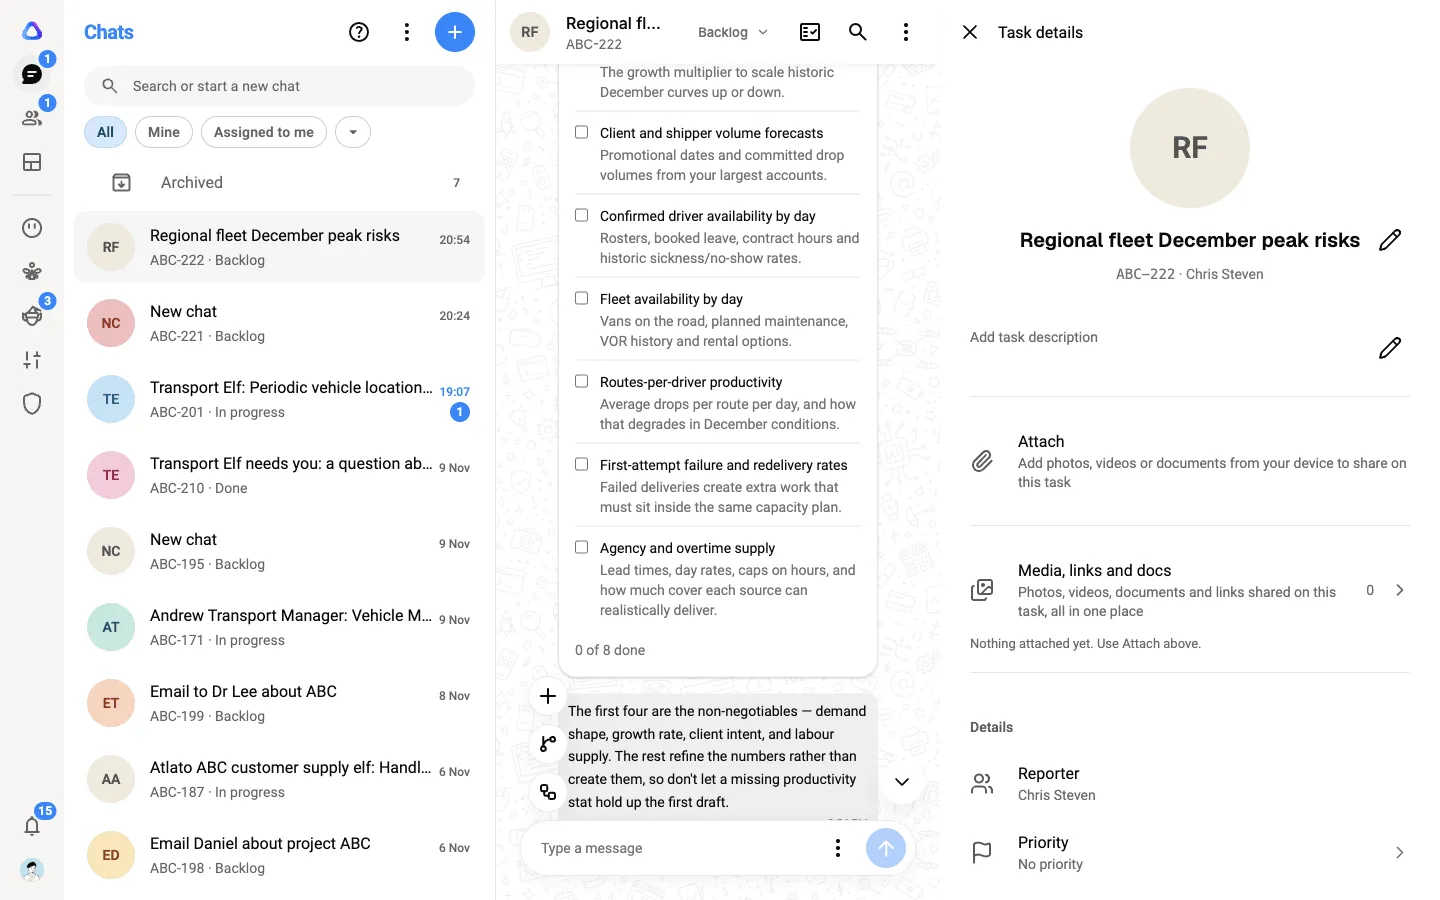
Atlato ABC is laid out like a messaging app. A narrow rail on the left picks the section, the column beside it lists what is in that section, and the main view shows the one thing you opened.
The left rail
Section titled “The left rail”Each button in the rail opens a section. Point at a button to see its name.
| Button | What it is for |
|---|---|
| Chats | Your private AI chats, and work handed to you. Opens on a new chat, ready to type in. |
| Teams | Group chats with colleagues. |
| Dashboards | Live dashboards built from your workspace’s data, your apps and your files. |
| Agents | Ready-made Atlato agents and agents built by your team, each with its own chats. |
| Pixies | AI agents that make and answer phone calls for you. |
| Elves | Your AI workers, each with its own computer. |
| Personalization | Skills, connectors, plugins, knowledge bases, workflows, templates, web search and agents: what you give the AI to work with. |
| Admin | Members, roles, approvals, billing, AI providers and other workspace controls. |
At the bottom of the rail:
- Notifications (the bell) opens your notifications. See Notifications.
- Your profile photo opens a menu with your workspaces, Workspace settings, Settings, Help and Log out. Help opens this help site, in a new tab, at the guide for the screen you are on.
You only see the sections your role allows. A section you can’t use is hidden rather than greyed out, so two people in the same workspace may see different rails.
Counts on the rail
Section titled “Counts on the rail”A number on a rail button tells you how much is waiting there:
- Chats and Teams: how many chats or teams have something unread.
- Agents: how many agent chats are waiting for you to answer a question or approve a step.
- Elves: how many elves need you, for example to answer a question or sign in somewhere.
- Notifications: how many notifications you haven’t read.
The list column
Section titled “The list column”The column beside the rail lists what is in the section you picked: your chats, your teams, your agents, and so on. At the top you usually find:
- the section’s name and, at the right, its buttons, such as New chat (the blue +);
- a search field;
- filter chips, such as All and Unread, to narrow the list.
Most list columns also have a help button (the question mark) at the top. Its menu offers:
- Read the guide, which opens the page about that screen in this help site, in a new tab, so you keep your place in the app;
- Watch the video tutorial, on screens the welcome tour covers, such as Chats, Teams, Agents, Pixies and Elves;
- All help topics, which opens the front page of this help site.
Some sections go a level deeper. In Personalization, for example, selecting Skills lists your skills in the same column. Select the back arrow at the top of the column to come back up a level. Selecting the section’s button in the rail always takes you back to the top of that section.
The main view
Section titled “The main view”The main view shows what you opened from the list: a chat, a team, an agent’s chat, a dashboard. When nothing is open, it shows a short page about the section, often with a Read the guide link to its page in this help site.
In a chat, a details panel can open on the right. Select the chat’s name at the top to see its Task details: its status, priority, due date, files and links.
Settings
Section titled “Settings”Select your profile photo at the bottom of the rail, then Settings. The column shows your name at the top and lists your profile, account security, AI providers, usage, preferences and more. Type in Search settings to find one quickly. See Your settings.
Search everything
Section titled “Search everything”Press Ctrl + K (⌘ + K on a Mac) anywhere to search all your chats and tasks by name. See Organize your chats.