
Create a pixie
Creating a pixie takes ten short steps: who it is, what it does on calls, how it sounds, what it knows and may promise, who it answers and calls, and the phone number it uses. Only the name is required. Everything else you can skip and set later in the pixie’s settings.
Before you begin
Section titled “Before you begin”- You need to be an owner, admin or editor.
- You need your own OpenAI API key. See Pixies.
- To make and take calls, the pixie needs a phone number from the workspace’s Twilio account. You can create the pixie first and add a number later. See Telephony.
- Your workspace’s plan can limit how many pixies it has. If you see No room for another pixie, the workspace has reached that limit.
Create a pixie
Section titled “Create a pixie”Select Pixies in the rail, then New pixie. Each step ends with Next. A step marked optional can be skipped by selecting Next.
-
Who I am. Type the Name the pixie gives on the phone. Optionally add a Display Name, which is what your Pixies list shows (callers never hear it). Pick a face from Characters.
-
Playbook. Say what the pixie should do on every call: who it works for, what callers usually want and how it should help. For example, “You’re the front desk for Bright Smile Dental. Book appointments.” Keep it focused: a very long playbook makes the first reply of every call slower.
-
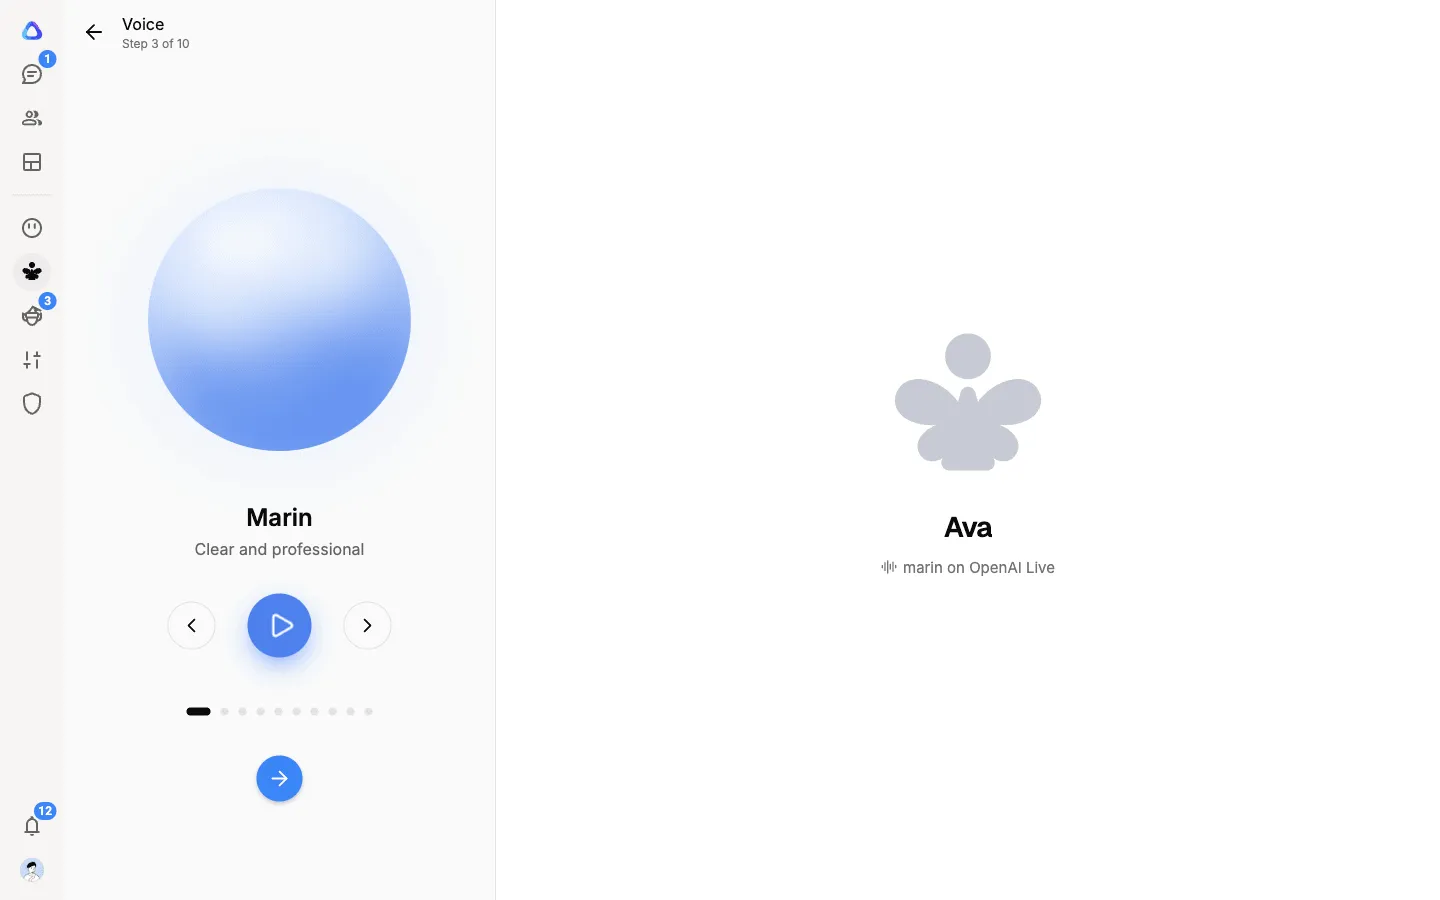
Voice. Play each voice and pick one. Each has a short description, such as Clear and professional or Warm and expressive.
-
Tone. Pick how it speaks, played in the voice you chose: Neutral, Formal, Warm, Cheerful, Brisk or Patient.
-
Connectors (optional). Select Add connector to choose connected apps the pixie may use on a call, such as your calendar for bookings. Only owners and admins can choose these.
-
What I know (optional). Select Add new documents to add price lists, policies and product sheets the pixie answers callers from. It takes PDF, text, Markdown, CSV or Excel files, up to 20 MB each, 50 files and 100 MB in all. A scanned PDF has no text to read, so run it through OCR first.
-
What I may promise (optional). List what it may agree to under Allowed (for example “Offer free delivery on orders over $50”) and what it must not do under Prohibited, one per line. Turn on Look things up on the internet if it may search the web. Only an owner’s or admin’s answers here are kept.
-
Incoming calls. Under Who can call me, choose Anyone, or Only numbers and contacts on my list and add them with Add a number or Add a contact. Anyone else is turned away before the pixie speaks.
-
Outgoing calls. Under Who I can call, choose Any number, or Only numbers and contacts on my list. A call to anyone else is refused.
-
Connect your Twilio. Pick the phone number the pixie answers and calls from, or No number for now. If the workspace’s Twilio account is not connected yet, the owner can connect it here with the Account SID and Auth token. Others can skip this step.
Select Create pixie. The pixie is set up, with progress shown as it goes, and then its page opens.
Change a pixie’s settings
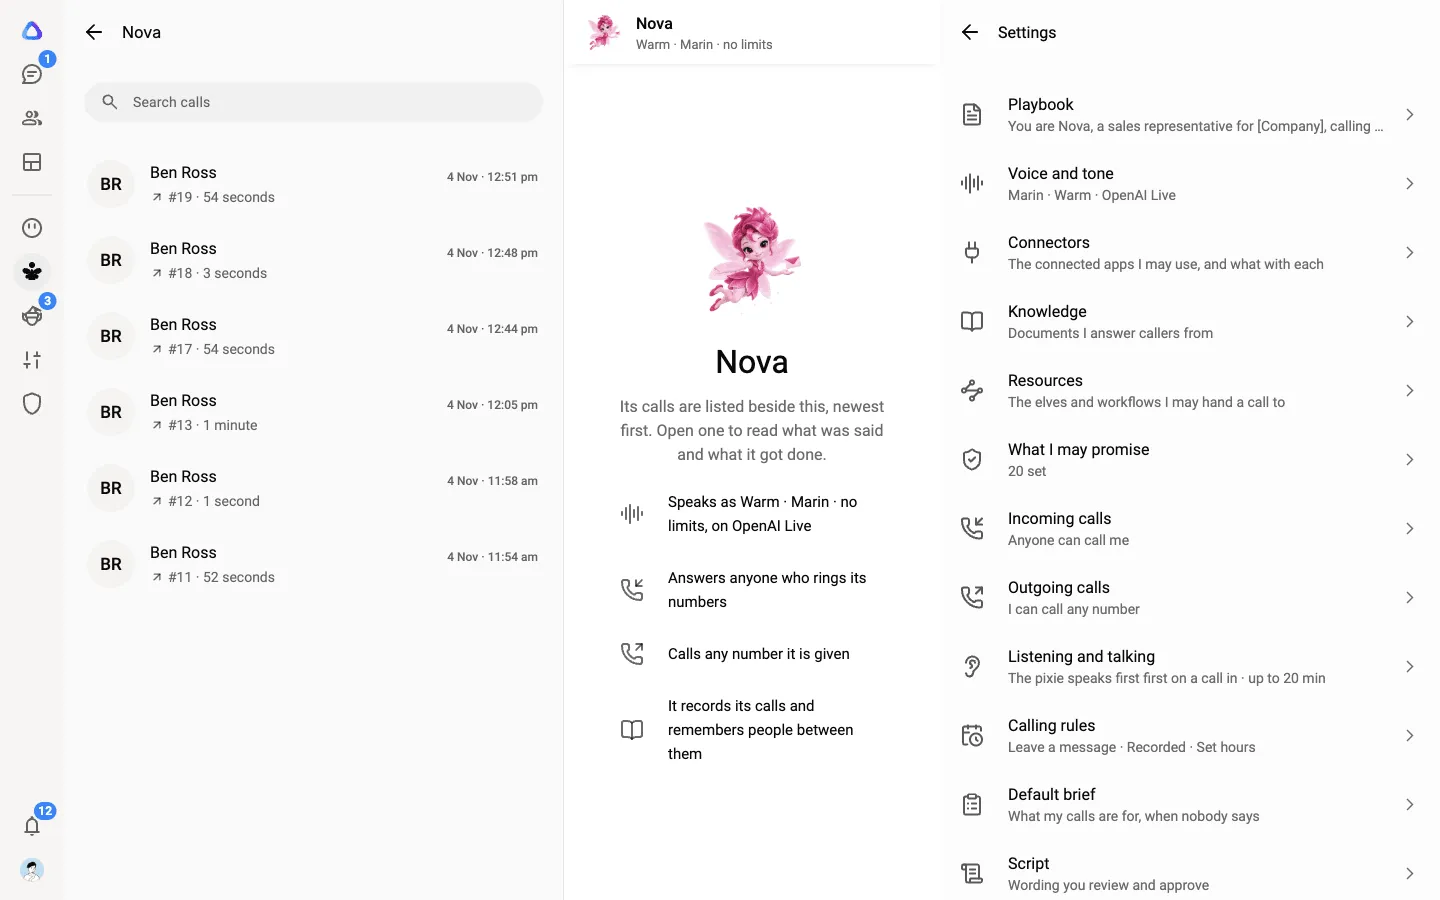
Section titled “Change a pixie’s settings”Open the pixie, select Pixie details, then Settings. Owners, admins and editors can change settings. Each screen ends with Save.
| Setting | What it covers |
|---|---|
| Playbook | Its instructions for every call. |
| Voice and tone | Voice, tone, Describe the tone in more detail, Language, and under Models, its Thinking effort and Creativity. |
| Connectors | The connected apps it may use on a call, and what it may do with each. |
| Knowledge | The documents it answers callers from. |
| Resources | The elves and workflows it may hand a call to. See Transfers and routing. |
| What I may promise | What it may and may not agree to (Allowed and Prohibited), and whether it may Look things up on the internet. |
| Incoming calls | Who can call it. |
| Outgoing calls | Who it can call. |
| Calling rules | Voicemail, retries, calling hours, transfers, recording and memory. |
| Who can work with me | Who can see the pixie, place calls with it and read its calls. |
Language
Section titled “Language”In Voice and tone, select Language and choose the language it speaks and listens for. Pick the language your callers speak.
Calling hours
Section titled “Calling hours”In Calling rules, turn on Only call during set hours, tick the days, and set From and Until. Outside these hours a call waits until the next allowed time, in the other person’s time zone. Set Time zone, when theirs is unknown for contacts without one.
If no days are ticked, the pixie never places a call.
Voicemail and retries
Section titled “Voicemail and retries”In Calling rules:
- If an answering machine picks up: Hang up, Leave a message, Leave a message and send a text or Send a text only.
- The message it leaves. Left empty, it says who called and why.
- Tries before giving up, counting the first call. A call that is answered is never tried again. New pixies try 3 times.
- Wait between tries, in minutes, for example 15, 60, 240.
Recording and memory
Section titled “Recording and memory”Also in Calling rules:
- Record calls, with What it says first: the notice said before anything else on every recorded call. Left empty, it says “This call is being recorded.”
- Remember people between calls. The pixie keeps a short summary of each call and brings it up next time. To stop it learning about one person, see Phone book.
New pixies record calls and remember people. Rules on recording calls differ from place to place, so check what applies to you and your callers.
Who can work with me
Section titled “Who can work with me”Choose Only me, Shared with (and pick people) or Anyone in the workspace. People you share with can see the pixie, place calls with it and read its calls.