
Build a workflow
You build a workflow on a visual canvas: add steps, fill in their settings and connect them in order. Everything you do is saved as a draft, which never runs. When it is ready, you publish a version, and that version is what runs.
Before you begin
Section titled “Before you begin”- Your role needs to let you build workflows. If Workflows is missing under Personalization, ask an admin.
- Use a window at least 1280 pixels wide. On narrower screens the settings panel beside the canvas is hidden.
- Set up anything the workflow will use first, such as agents, connectors, pixies or templates.
Create a workflow
Section titled “Create a workflow”-
Select Personalization → Workflows, then New workflow (the plus sign at the top of the column).
-
Under Start from, choose Blank for an empty workflow, or Copy an existing workflow to start with another workflow’s steps. Then select Next.
-
Give it a Name that says the job it does, such as “Inbound lead triage”. You can add a description and Tags to group related workflows.
-
Choose Who can see this workflow: Only me, Shared with (pick people), or Anyone in the workspace. Everyone it is shared with can run it once you publish.
-
Select Create draft. The editor opens.
Import a workflow someone shared
Section titled “Import a workflow someone shared”If a colleague sends you a workflow file (a .json file they exported), you can bring it in as a new draft.
-
In the Workflows column, select ⋮ → Import JSON.
-
On Upload a file, drag the file in or select the box to choose it. You can also pick a ready-made workflow on the Examples tab.
-
Check the name and who can see it, then select Import workflow.
If the file has problems, you see Imported with errors - fix these in the editor before publishing. The draft is still created, so you can fix it in the editor.
Add and connect steps
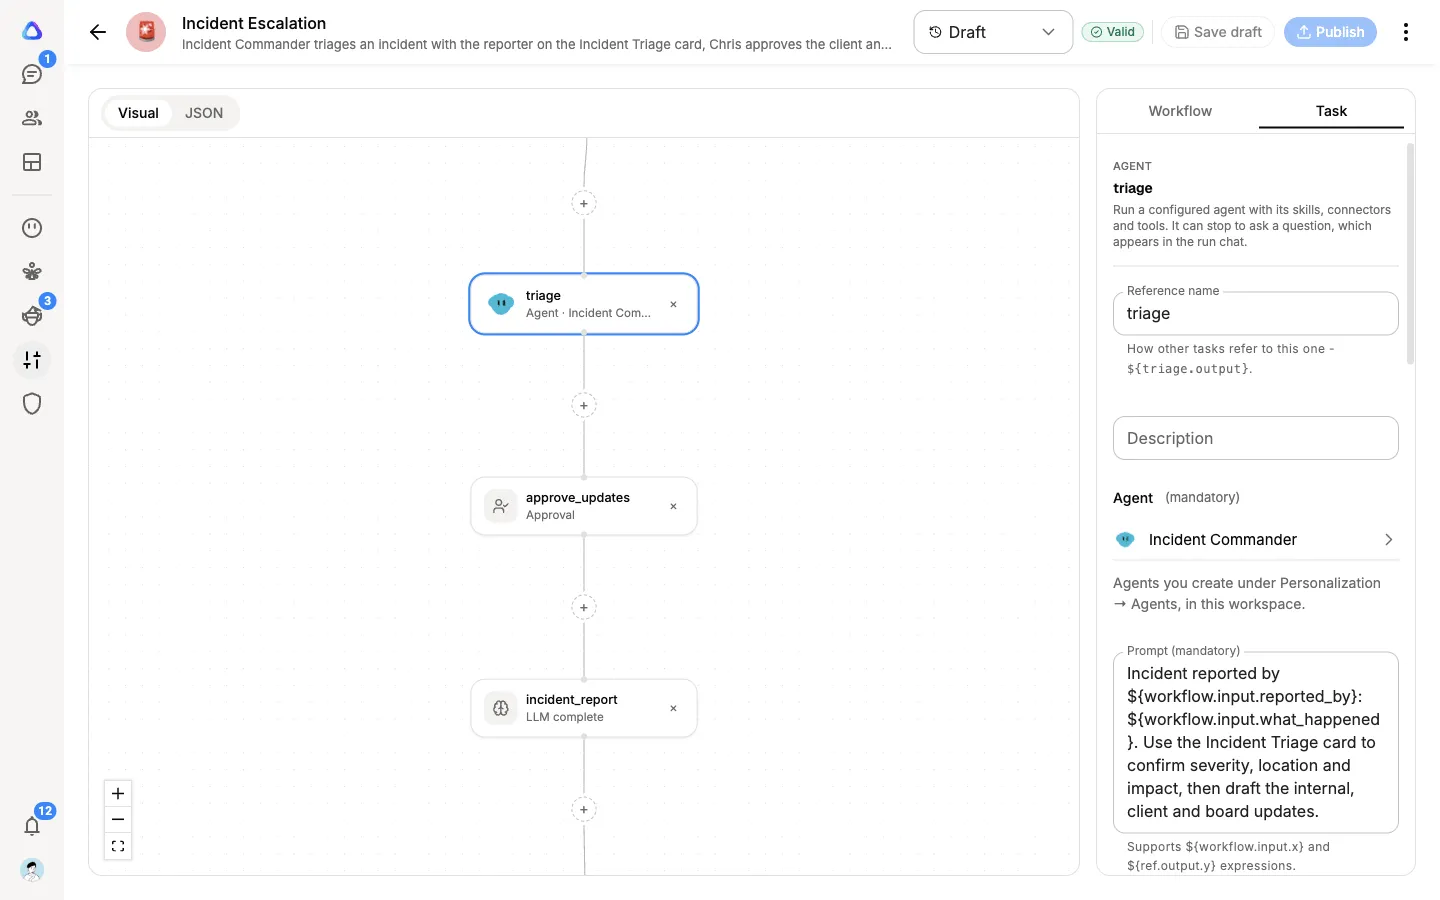
Section titled “Add and connect steps”The canvas shows your workflow from start to end. Each box is a step (the editor calls them tasks).
-
Select a + on the canvas, between two steps or at the start, to add a step there.
-
Pick a step from Quick add, or select More tasks to open Add Task and search every step by group: Atlato, Control, Integration and Human.
-
Select the new step to open its settings on the Task tab, and fill them in. Required settings are marked (mandatory).
-
To use something an earlier step produced, such as an agent’s answer, select Insert a value from another step in a setting and pick it.
Branching steps grow their own buttons on the canvas: + case on a Switch, and + branch on a Fork / Join. To delete a step, select it and choose Delete, or use Remove task at the bottom of its settings. If a later step reads the deleted step’s output, the editor warns you first.
To let the workflow carry on even if a step fails, turn on Make task optional at the bottom of that step’s settings.
See Workflow steps for what each step does.
Set the workflow’s inputs
Section titled “Set the workflow’s inputs”Inputs are what a person fills in when they start a run, such as a customer’s email address or a file to process.
-
Select the Workflow tab beside the canvas. Under Input parameters, select Add parameter.
-
For each input, set its Name, Type and Label (what the person sees). Types include text (STR), number (NUM), yes or no (BOOL) and file (FILE).
-
Set any rules: Optional, Allowed values, a minimum or maximum, or for files, Allow multiple files, the file types allowed (Images, Video, Audio, Documents or All files) and Max size per file (MB).
-
Select Update.
A run that does not match the inputs is refused before it starts, so people get a clear message rather than a failed run.
Save and check
Section titled “Save and check”Select Save draft often. After your first save, the chip in the top bar shows whether the draft is ready: Valid, or a count of errors and warnings. Select a step to see its problems at the top of its settings and under the setting that needs fixing, such as Choose a model on an AI step. Errors stop you publishing; warnings do not.
If you try to leave with unsaved changes, you are asked whether to Save and leave or Discard changes.
Publish a version
Section titled “Publish a version”-
Select Publish. Your draft is saved first.
-
Check the comparison between the draft and the version that runs now. Unsaved changes are not included.
-
Select Confirm.
The first publish creates v1, the next v2, and so on. Every published version is kept. Runs, schedules and API keys always use the latest published version. Until you publish again, changes in your draft do not affect anything that runs, and the editor reminds you with Draft not published.
Look at or go back to an earlier version
Section titled “Look at or go back to an earlier version”Once a workflow is published, a version picker appears in the top bar. It lists Draft and every version, with the one that runs marked (live).
Pick a version to see it. Published versions are read-only. To go back to one, select Restore to draft: it copies that version over your draft, and it becomes live only when you publish it.
Manage your workflows
Section titled “Manage your workflows”Each workflow in the column has a ⋮ menu. Depending on your access it offers:
| Item | What it does |
|---|---|
| Run | Starts a run of the published version |
| Edit | Opens the editor |
| Run history | Lists every run of this workflow |
| Duplicate | Makes a copy as a new draft |
| Export JSON | Saves the workflow as a file you can share or import elsewhere |
| Add to Favourites | Stars it, so it appears under Favourites |
| Who can see this… | Changes who can see and run it |
| Delete | Deletes the workflow (owners and admins only) |
You can also open Workflow details, Run history, Schedules and Who can see this… from the ⋮ menu in the editor’s top bar.