
Create an elf
Creating an elf takes a minute: you give it a name and a face, pick the size of its computer, and optionally choose its skills, guardrails and models. Everything except the name is optional, and you can change it all later in the elf’s settings.
Before you begin
Section titled “Before you begin”- Your role must allow you to create elves. If you do not see New elf in the Elves column, ask an owner or admin. See Role templates.
- Connect an AI provider, a subscription or an API key. If you have none, the steps ask you to add one. See Your AI providers.
- Your workspace’s plan can limit how many elves it has. If you see No room for another elf, the workspace has reached that limit.
Create an elf
Section titled “Create an elf”-
Select Elves in the rail, then select New elf (the plus sign) at the top of the column.
-
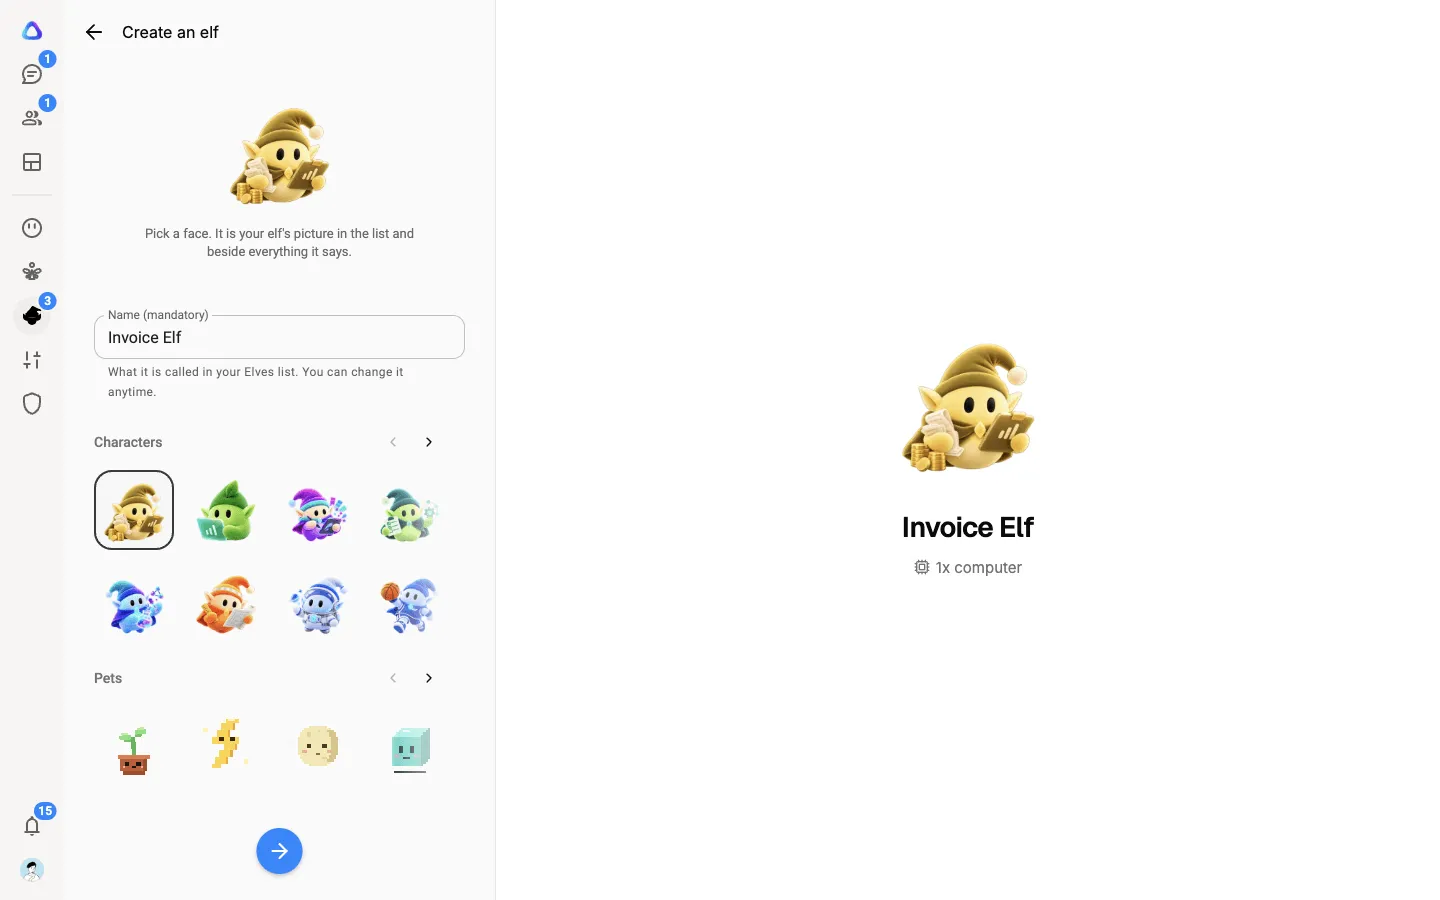
On Create an elf, type a Name. It is what the elf is called in your Elves list.
-
Pick a face from Characters or Pets. The face is your elf’s picture in the list and beside everything it says. To use your own picture instead, upload one after the elf is made (see Change its name or face). Select Next.
-
On Computer, choose a Computer size, then select Next.
Size Best for 1x Most work: chat, browsing, documents and connected apps. 2x Heavier work like builds and big files. Runs at twice the rate. 4x The heaviest work: large builds, data and many apps at once. Runs at four times the rate. If your role cannot grow an elf, only 1x is available.
-
On Skills, pick any skills that fit, or none. Skills are step-by-step instructions for a job, like turning notes into minutes. Select Next.
-
On Plugins, pick any plugins that fit, or none. A plugin brings a bundle of skills from one source. Select Next.
-
On Guardrails, choose what your elf does on its own, what it asks you first and what it leaves to you. Select Add rule, or select one of the suggestions, such as Send an email or post a message: ask before taking action. This step is optional. See Guardrails.
-
If you have no AI provider the elf can use, the AI provider step appears. Select Add an AI provider, add one in the tab that opens, then come back and select I’ve added one, check again.
-
On Models, you can choose two models, or keep the defaults:
- Common task model does the everyday work.
- Advanced planning model drafts and re-plans the elf’s plans. It uses the same connection as the common task model.
-
Select Create elf.
Your elf’s computer starts up, which usually takes a minute or two, and then its chat opens. Say hello, or give it its first job. See Give an elf a task.
If the setup fails, you see Your elf could not start with the reason. Select Try again.
Which AI your elf uses
Section titled “Which AI your elf uses”Your elf thinks with your own AI provider. When you create it, it uses a subscription if you have one, otherwise an API key. Picking a Common task model also picks the connection it runs on, so this is where you choose between several keys or subscriptions.
Some subscriptions cannot run elves under their provider’s terms. If yours is one, the app says so: add an API key and pick a model from it instead.
To change the models later, open the elf, select Settings in the Elf details panel, then Model.
Change its name or face
Section titled “Change its name or face”Select the elf’s face at the top of the Elf details panel. You can:
- Type a new name.
- Pick another face from Characters or Pets.
- Select Upload an image to use your own picture: a PNG, JPEG, GIF or WebP image up to 2 MB.
You can also rename an elf from its menu (the … button at the top right of the elf page).
Tell it what it is for
Section titled “Tell it what it is for”In Settings, select About:
- What this elf is for is the elf’s standing brief. A new elf starts with a general one: help you with what you ask, use its computer and apps, and check in when it matters. Rewrite it to give the elf a focus, such as “Keep my inbox sorted and draft replies for me to check”.
- Personality sets how it talks. Pick a starting point, Direct, Warm, Playful, Formal or Concise, and edit it freely.
Changes apply from the elf’s next message, without a restart.
Change its computer
Section titled “Change its computer”In Settings, select Computer:
| Setting | What it does |
|---|---|
| Computer size | 1x, 2x or 4x. A bigger computer works faster and uses more credits per minute. A change applies at the next start, so a running elf restarts. |
| Always on | Keeps the computer running round the clock instead of sleeping when idle. It is billed per minute the whole time. Pause still stops it. |
| Start plans without asking | When off, a new task waits for you to select Start in the chat. When on, it starts as soon as it is planned. |
| Learn from chats | Now and then the elf looks back over a chat and may draft a skill for you to approve. Each look-back uses your AI model. On for a new elf. See Learned skills. |
Your role decides whether you see Computer size and Always on. A role that cannot grow an elf can still make it smaller.